Tilt-and-turn windows are brilliant, until the handle won’t budge, the sash sags, or a mystery draft shows up. The good news: most fixes are simple once we understand what’s going on inside the hardware. In this guide, we’ll walk through how to fix a tilt and turn window mechanism step by step, from diagnosing the problem to making confident adjustments. We’ll keep it friendly and practical, with the right safety notes so we don’t turn a sticky handle into a bigger headache.
Key Takeaways
- Start with safety when learning how to fix a tilt and turn window mechanism—support the sash, work on stable footing, and never pull hinge pins solo.
- Reset the safety selector with the sash closed and the handle at 45° to clear most stuck handles and half-tilt/half-turn jams.
- Realign the sash using bottom height, side lateral, and top scissor adjustments until the reveal is even and both tilt and turn engage smoothly.
- A key step in how to fix a tilt and turn window mechanism is setting cam compression and striker alignment—back off for a stiff handle, tighten to stop drafts, and tweak seasonally.
- Lubricate hinges, cams, and gearbox with PTFE/silicone (not straight WD‑40), clean tracks and weep holes, and replace worn handles or gearboxes as needed; call a pro for severe drops or risky access.
How Tilt-And-Turn Hardware Works
Handle, Gearbox, and Spindle
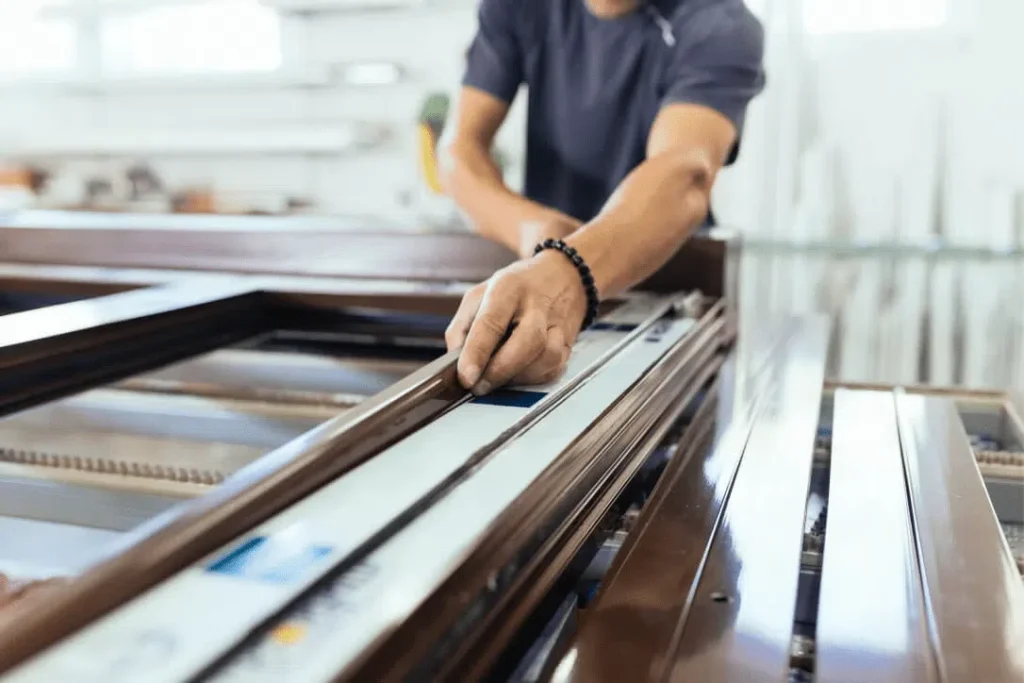
When we move the handle (down = locked, horizontal = turn, up = tilt), a 7 mm square spindle drives a gearbox hidden in the sash edge. That gearbox transfers motion to metal strips around the sash, often called the espagnolette and corner drives. If the handle spins freely, the spindle or gearbox may be stripped. If it’s stiff, the gearbox or cams may be under too much compression, or just dry.
Cams, Striker Plates, and Seals
Around the sash edge, you’ll spot little “mushroom” cams or roller cams that hook behind striker plates on the frame. These pull the sash tight to the seals. Most cams are eccentric: rotate them and you change compression, looser for summer, tighter for winter. Too tight = hard handle, wear on the gearbox, and sometimes the sash won’t fully engage. Too loose = rattles and drafts.
Hinges, Corner Drives, and Safety Selector
Tilt-and-turn uses two opening actions: the side-hinged “turn” and the top scissor hinge “tilt.” The top scissor controls the tilt gap and keeps things safe. There’s also a safety selector (sometimes a small button or lever on the sash edge near the handle) that prevents tilt and turn from engaging at the same time. If that selector sticks, the window can get “confused” and jam in a half-position.
Safety, Tools, and Prep
Safety Precautions and Supporting the Sash
Window sashes can be surprisingly heavy, especially larger, double-glazed units. We always support the sash during adjustments, and we never remove hinge pins without a second person. Keep fingers clear of the closing edges, and work on a stable step or platform. If you’re above ground level, be extra cautious in turn mode: the sash can swing wide.
Essential Tools and Lubricants
- 4 mm Allen/hex key (common for hinge and cam adjustments)
- Torx bits (T15/T20 are typical on European hardware)
- Phillips/Pozi and flat screwdrivers
- Needle-nose pliers and a plastic pry tool (an old credit card works in a pinch)
- Tape measure and a couple of soft shims or wedges
- Non-staining PTFE or silicone spray for moving parts
- Light machine oil for metal joints: silicone conditioner for rubber seals
We avoid using straight WD‑40 as a lubricant. It’s a great water displacer, but it’s not ideal long-term on precision hardware.
Accessing Hardware Without Damaging the Frame
Most covers on hinges and striker plates pop off with a gentle pry, use plastic, not metal, to protect finishes. To view cams, open the sash in turn mode and look around the sash perimeter. If you need to remove the sash entirely, turn it open to 90°, support it from below, and release the top scissor clip/pin before lifting the bottom hinge pin. Only do this with two people and plenty of support.
Diagnose the Problem
Handle Stuck or Free-Spinning
- Stuck handle: Usually excessive compression (cams too tight), dried-out gearbox, or the safety selector is engaged. Try resetting the selector (we’ll cover that) and backing off cam compression a touch.
- Free-spinning handle: Check the handle’s set screws and spindle. If the spindle turns but nothing else happens, the gearbox could be stripped.
Won’t Tilt, Won’t Turn, or Stuck Open
- Won’t tilt: The safety selector might be blocking tilt, or the scissor hinge is jammed. Sometimes the sash is settled too low, so the top corner drive can’t engage.
- Won’t turn: The bottom/side hinge alignment may be off, or a cam is colliding with a striker. Compression that’s too high can also prevent the “turn” from releasing.
- Stuck open (half-tilt/half-turn): Classic selector issue. The hardware is trying to do two things at once. We’ll reset it shortly.
Misalignment, Rubbing, or Drafts
Close the window and look around the reveal gap. Is it even? A drooping latch side usually points to height or lateral hinge adjustment. Rub marks on the frame point to where it’s binding. For drafts, do the paper test: close a strip of paper in the sash and pull. If it slides out easily on one side, increase compression there or shift the striker plate slightly.
Step-by-Step Fixes and Adjustments
Reset the Tilt/Turn Safety Selector and Handle Position
- With the sash closed against the frame, hold the handle at about 45° (between down and horizontal).
- Find the safety selector on the sash edge near the handle, usually a small springy lever or button. Press or slide it toward the gasket while gently turning the handle down to the locked position.
- Now test: up for tilt, down to lock, horizontal for turn. If it still binds, repeat once more. A little wiggle of the sash while pressing the selector helps it re-engage properly.
Pro tip: If the sash is stuck open in tilt, gently push the top of the sash toward the frame while pressing the selector and turning the handle down. Don’t force it, steady pressure wins.
Realign the Sash: Hinge, Corner, and Height Adjustments
Most tilt-and-turn hinges offer three tweaks:
- Height (bottom hinge): A 4 mm Allen screw on the bottom pivot raises/lowers the sash. Quarter turns only: re-test the gap after each tweak.
- Lateral (side hinge): Another hex screw shifts the sash toward or away from the hinge side. Use this to correct rubbing on the latch side.
- Pressure/fine top alignment (scissor/corner area): The top corner drive or scissor linkage may have an eccentric screw or small Allen that nudges the sash sideways. Tiny adjustments go a long way.
Goal: an even reveal (usually 3–5 mm) and clean engagement with the strikers. If the latch side drops, add a touch of height at the bottom hinge and a hair of lateral toward the hinge. Test in both tilt and turn: it should engage smoothly without scraping.
Adjust Mushroom Cams and Strikers for Proper Sealing
- Identify eccentric cams along the sash. You’ll see a marking line or an off-center “mushroom.” Rotate with a 4 mm Allen or pliers.
- Start with medium compression. If the handle’s too hard to move, back off a notch. If you feel drafts or the paper test is loose, add compression.
- Striker plates on the frame often sit in slotted holes, loosen slightly, slide a millimeter or two to meet the cam cleanly, and retighten. Don’t overtighten: you want snug, not stripped.
Tip: Seasonal tuning is normal. A quarter turn tighter in winter, a quarter looser in summer keeps things comfy without stressing the gearbox.
Lubricate Moving Parts and Clear Debris
- Lightly oil hinge pins, the scissor slider, and the gearbox engagement points (where accessible). Wipe excess, oil attracts dust.
- Spray PTFE/silicone on cams and along the espagnolette strips: operate the handle a few times to work it in.
- Clean drainage/weep holes at the bottom of the frame and brush out tracks. Grit in the scissor track can make tilt feel jerky.
- Wipe gaskets with a damp cloth, then condition with a silicone-safe product to keep them supple.
Replace Worn Components (Handle, Gearbox, or Scissor Hinge)
- Handle: Most use 43 mm screw centers with a 7 mm spindle. Remove the cover plate, undo two screws, and swap. If the old spindle is chewed, the gearbox may also be worn.
- Gearbox/espagnolette: Look for brand marks along the metal (Roto, Siegenia, GU, Winkhaus, Maco). Match the part and length. Note the backset and corner-drive type. Take photos before removal, then transfer one piece at a time so nothing gets mixed up.
- Scissor hinge: Support the sash, release the scissor clip/pin, and swap with a matching part. Re-check alignment afterward.
If a screw just spins in uPVC or timber, use a slightly larger screw or a repair plug. For aluminum frames, stick to manufacturer-spec fasteners.
Maintenance and Long-Term Care
Annual Lubrication and Tightening Checks
Once a year, run the handle through its positions and add a drop of oil to hinges and moving joints. Check a few screws on strikers and hinge covers, snug them up, but don’t overdo it. A minute of TLC here saves gearboxes later.
Clean Tracks, Drainage, and Gaskets
Keep the scissor track and lower frame channels free of grit. Clear weep holes so water can escape. Wipe gaskets clean and give them a silicone-safe conditioner: dried-out seals cause drafts and make the handle work harder.
When to Call a Professional
If the sash has dropped dramatically, the frame is cracked, glass needs deglazing, or the gearbox won’t engage after a reset, it’s time for a pro. Also, if the window is on an upper floor and you’re not set up for safe handling, don’t risk it. Many installers can source exact-match hardware quickly and finish the job in one visit.
Conclusion
Most issues boil down to three things: the selector needs a reset, alignment has drifted, or compression is off. Now that we’ve covered how to fix a tilt and turn window mechanism, from diagnosis to careful adjustments, you can get that smooth, satisfying handle click back. Take it slow, work in small increments, and don’t be shy about seasonal tweaks. And if something feels wrong or unsafe, we call in a pro. Windows that work right make the whole room feel better.
Frequently Asked Questions
How do I fix a tilt and turn window mechanism stuck in a half-tilt/half-turn position?
Close the sash. Hold the handle around 45 degrees. Press the safety selector on the sash edge toward the gasket while gently turning the handle down to lock. If stuck in tilt, push the top of the sash toward the frame as you press the selector. Then test tilt, lock, and turn.
Why is my tilt and turn window handle hard to move or spinning freely?
A stiff handle usually means over-tight cam compression or a dry gearbox; back off the eccentric cams slightly and lubricate with PTFE/silicone. A free-spinning handle points to loose set screws, a chewed spindle, or a stripped gearbox; tighten the handle, inspect the spindle, and replace the gearbox if engagement is lost.
How to fix a tilt and turn window mechanism if the sash rubs or won’t latch?
To fix a tilt and turn window mechanism when the sash rubs or will not latch, use hinge adjustments. With a 4 mm Allen, raise the bottom hinge in quarter turns, shift laterally on the side hinge to clear rubbing, and fine-tune the top scissor. Aim for an even 3–5 mm reveal, then re-test.
How do I adjust mushroom cams to stop drafts on a tilt and turn window?
Open in turn mode to access the cams. Rotate the eccentric mushrooms to change compression: tighter stops drafts, looser eases the handle. Use the paper test to confirm grip, and slide striker plates a millimeter if needed. Seasonal tweak: about a quarter turn tighter in winter, looser in summer.
Are tilt and turn window parts universal, and how do I identify the right replacement mechanism?
Mostly no. Tilt-and-turn gearboxes, corner drives, and scissor hinges are brand-specific. Handles are commonly standard (43 mm screw centers, 7 mm spindle). Identify your system by brand marks (Roto, Siegenia, GU, Winkhaus, Maco), measure backset and espagnolette length, and photograph the layout before ordering to ensure compatible replacements.
How much does it cost to fix a tilt and turn window mechanism, and when is DIY worth it?
DIY costs to fix a tilt and turn window mechanism are often $10–$30 for lubricants and small tools. Replacement handles run $15–$40, gearboxes/espagnolette $50–$150, scissor hinges $40–$100. Professional labor or a service call is typically $120–$250, totaling $150–$450. DIY minor adjustments; hire pros for dropped sashes or failed gearboxes.